
Difficulty
Easy
Steps
7
Time Required
00:10:00
- How to Humidity and Temperature 7 steps

User-Contributed Guide
This guide is not managed by the site's staff.
Quiz
0
-
-
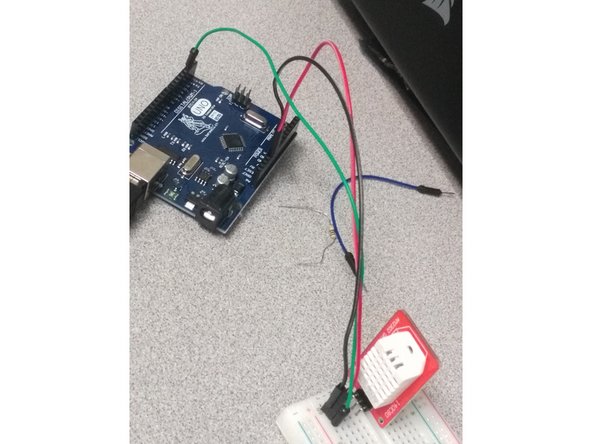
Start by grabbing the three jumper cable wires.
-
Plug in each wire to the three different prongs of the AM2302/DHT22 sensor
-
1: Ground (GND) [BLACK]
-
2: 5v power (VCC) [RED]
-
3: pin 2 (DAT) [GREEN]
-
-
-
This is the same thing as the previous slide, but the cables are shown plugged in
-
-
-
Grab your laptop, Arduino, and an USB 2.0 A-Male to B-Male Cable
-
Plug the USB A end to the laptop
-
Plug the USB B end into the Arduino Uno
-
I did use a breadboard here but it is unnecessary as there are no resistors used. You can do either.
-
-
-
Download the Arduino IDE if you have not already: https://www.arduino.cc/en/Main/Software
-
Once downloaded, open up the application and continue to the next section
-
-
-
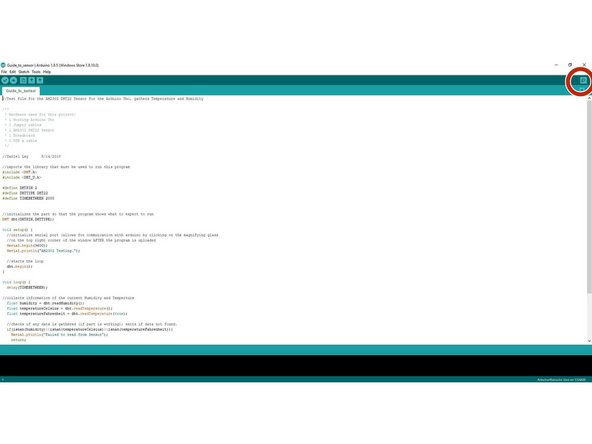
Here is some source code that runs basic processes to see if the hardware works
-
GitHub link: https://github.com/BrandeisMakerLab/Ardu...
-
Make sure that you select the correct board and port (under the tools section)
-
Verify and Upload the code to the Arduino
-
-
-
Click the magnifying glass on the top right corner to access the Serial Monitor.
-
-
-
Congratulations! you have successfully used the AM2302/DHT22 sensor, go have fun!
-


Cancel: I did not complete this guide.
One other person completed this guide.