Difficulty
Easy
Steps
7
Time Required
04:00:00 - 06:00:00

In Progress
This guide is currently being written. Reload periodically to see the latest changes.

User-Contributed Guide
This guide is not managed by the site's staff.
Quiz
0
Introduction
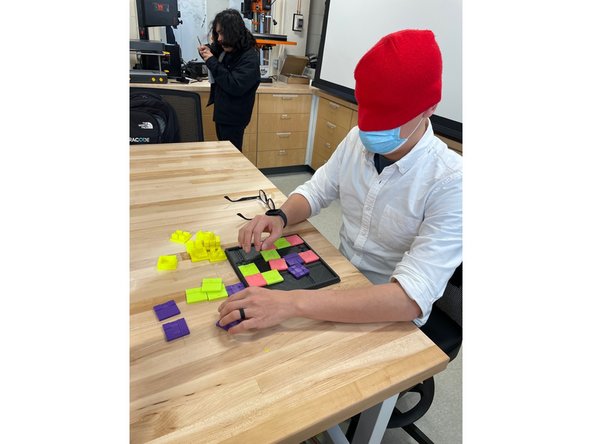
The tactile puzzle is an inclusive and creative solution to help sighted and non-sighted children, ideally 6-10 years old, work together and better understand how one another interacts with the world around them. This puzzle is most beneficial for visually-impaired children since it improves their spatial awareness of an area that would be typically difficult for them to visualize.
Non-sighted children can only experience what they can touch. They may think a car is only a seat and a door handle when sighted children know a car has multiple doors, wheels, windows, etc. With this in mind, a tactile puzzle about a road map can help children understand where and how they may cross the road, how roads are laid out, and any buildings or important objects -- such as stoplights and lamp posts -- that surround the roads. The puzzle is meant to combine education with recreation, and this is accomplished by making the puzzle a game.
The guide itself is to meant to provide directions for how many tiles should be printed and how users can play the tactile puzzle game.
Tools
Parts
No parts specified.
-
-
Print out as many base pieces as needed; the more pieces, the more complex the puzzle becomes. The original prototype had 25 base pieces printed at a size of 66 x 66 mm.
-
The amount of base pieces printed must have a corresponding amount of top pieces. Tiles can be scaled accordingly.
-
Types of pieces in original puzzle design: 4-way intersection, 3-way intersection, curved roads, and straight roads.
-
-
-
The amount and type of top piece must correspond with the amount and type of base piece.
-
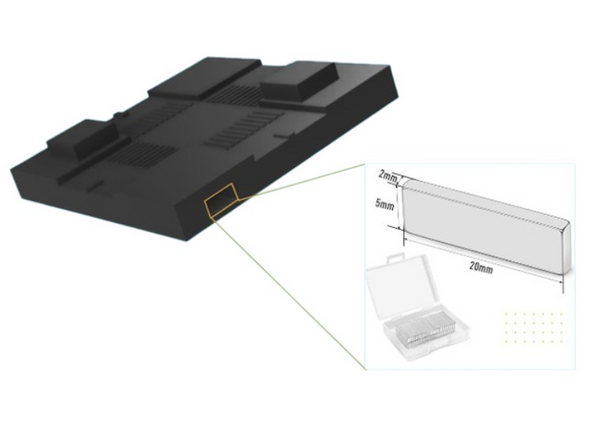
All 66 x 66 mm pieces should be printed with a 4 x 8 mm hole already placed at diagonal and opposite sides of the tile. Tiles can be scaled accordingly.
-
-
-
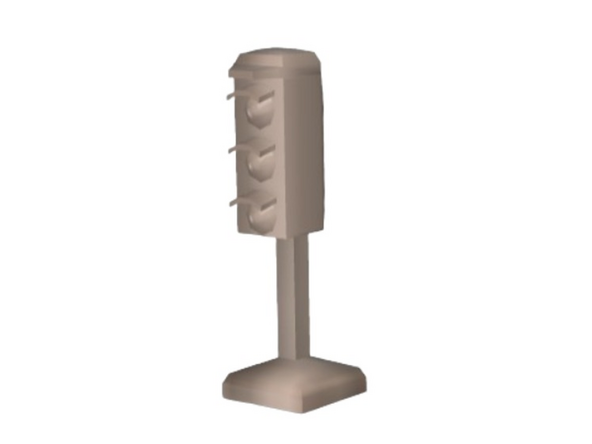
This varies based on the quantity and type of tile piece you have. 4-way intersections have a square peg for the stoplights. Straight roads have a circular peg for lamps.
-
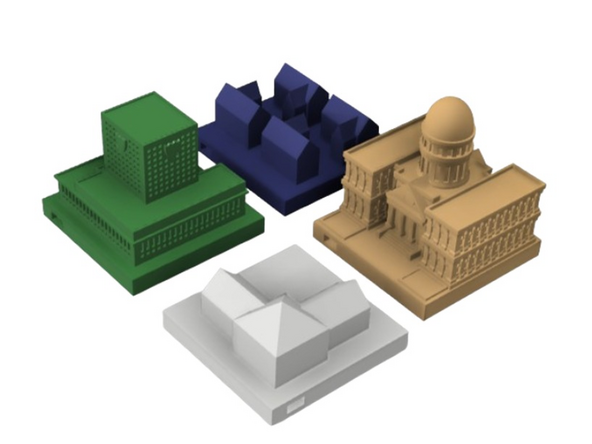
Other decor pieces include a collection of houses, a police station, a school, and a tree with its accompanied planter.
-
Buildings were printed at a size of about 66 x 66 mm.
-
Stoplights were printed parallel to the print bed at around 53 mm on the x-axis and 16 mm on the y-axis.
-
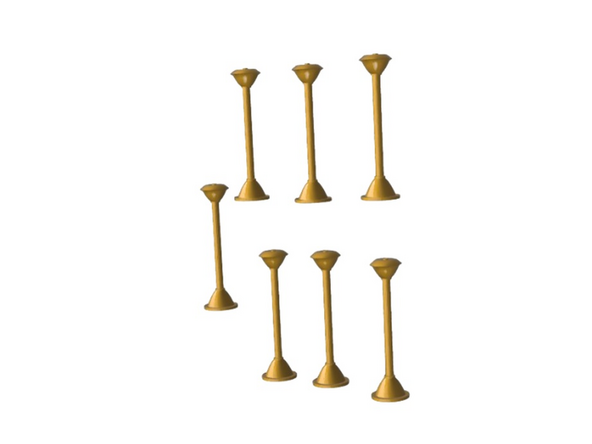
Lamps were printed parallel to the print bed at around 17 mm on the x-axis and 61 mm on the y-axis.
-
Except for the stoplights and lamps, all other decor can fit anywhere on the created board made from the base tiles.
-
-
-
This is what connects the base and top tile pieces together, allowing for the pieces to stay in place with enough friction that the pieces won't slide off one another.
-
If the hole is too big for the magnets, use super glue or another adhesive to secure it.
-
In the original prototype, 20 x 5 x 2 mm magnets were used and secured with glue.
-
-
-
One player, sighted or non-sighted, creates their desired roadmap with any combination of pieces as they want. They can use all or less than the total amount of available base pieces.
-
-
-
The opposing player should match the pieces by touch only. The player that assembled the base layout will time them to see how fast their opponent can finish the puzzle.
-
If one player is sighted, they should obstruct their vision with an eye covering or keep their eyes closed.
-
-
-
Once the opposing player is finished and their time is recorded, the roles switch! Player with the fastest time wins!
-