Difficulty
Moderate
Steps
13
Time Required
01:00:00 - 02:00:00
- Lasercutting Maps 13 steps

In Progress
This guide is currently being written. Reload periodically to see the latest changes.

User-Contributed Guide
This guide is not managed by the site's staff.
Quiz
0
-
-
Identify the kind of map you're looking to laser cut. If it's a historical map, you may want to georeference it.
-
-
-
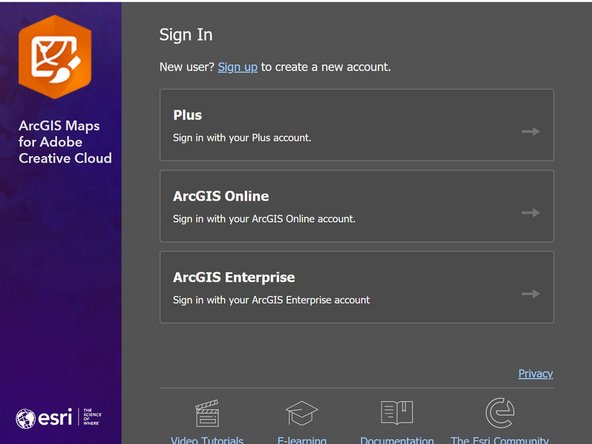
Export your map as an AIX file. To do so, enter the share tab at the top of the window. Click 'export map.' A pop up will appear. Change the file type to AIX. (Note: You need to have the previously mentioned ArcGIS for Creative Cloud plugin installed). Save this file wherever is best for you.
-
-
-
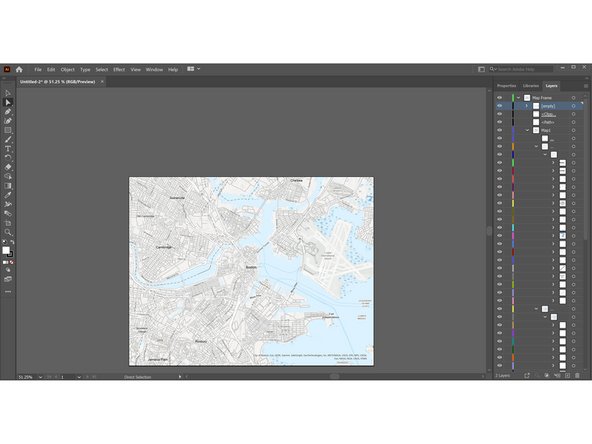
AIX files preserve original layers from your GIS map. On the right hand side of Illustrator, you'll see the layers organized as they were in GIS.
-
The chances are you don't need this much information, nor would you want to laser cut all of this. Tiny elements like street names don't play nicely with laser cutters.
-
Select the layers on the right hand side of the screen and use the eye button to the left of each layer to look and see what's removed from the map when you remove it. If you don't need it, press the delete button or us the trash can icon in the bottom right
-
Once you've made the edits you need to make, hit 'File > Export > Export As.' Change the file format to PNG - you'll be able to work much faster in this file format.
-
-
-
Open up the Epilog template on the Alienware laptop. Drag and drop in the PNG file you just saved.
-
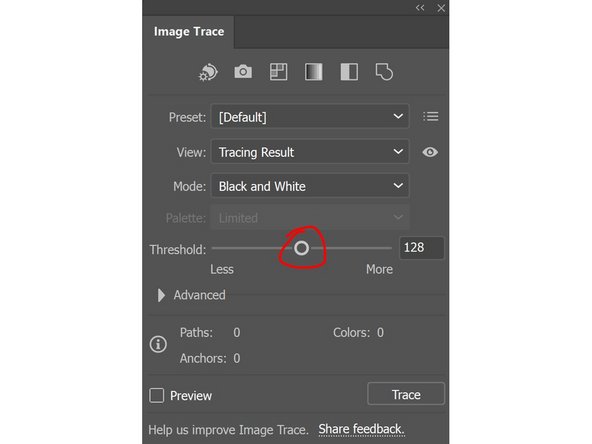
Select the image, then go to 'Window > Image Trace.' A new pop up will appear. This will help you create the outline of the image you need to laser cut.
-
Click the Preview option. Then drag the slider to see how the image is traced on your screen. It's a good idea to use 'Black and White,' since there's no color in a laser cut print anyway. Once you're happy with it, click out. (If you weren't using the Preview button, remember to hit 'Trace' before clicking away.)
-
-
-
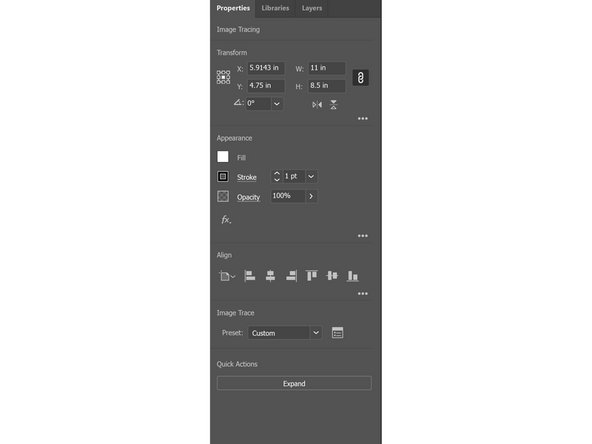
Select the entire image by either dragging over the image using the select tool or by pressing Ctrl + A.
-
Navigate to the Properties panel on the right hand side of the screen (shown.)
-
Do the following:
-
Change the fill to blank (white square with a diagonal red line)
-
Change the color of the stroke to red. (RGB 255,0,0 or CMYK 0%, 100%, 100%, 0%).
-
Change the stroke weight to 0.001pt (the number next to the word 'Stroke'.)
-
-
-
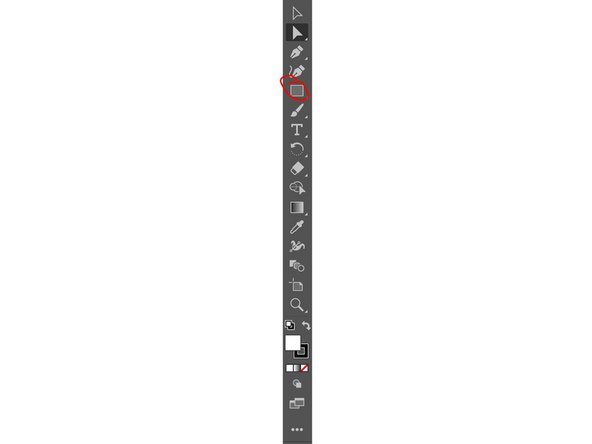
Now, draw a rectangle around the shape itself. The rectangle is the fifth option in your toolbar on the left side of your screen. Simply drag and release to draw the rectangle.
-
With your rectangle selected, adjust it as follows:
-
Change the stroke color to blue (RGB 0,0,255 or CMYK 100%, 100%, 0%, 0%).
-
Change the stroke weight to 0.001pt.
-
-
-
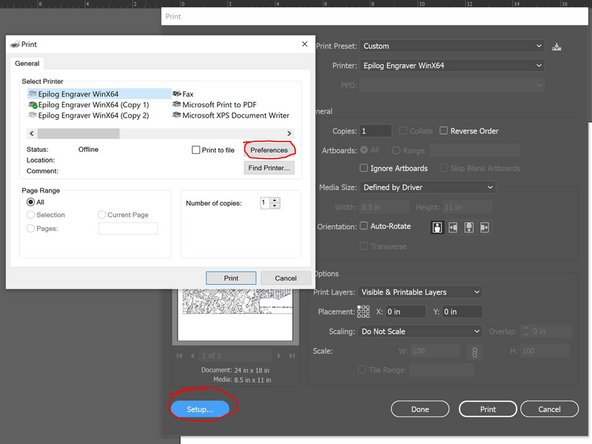
You're ready to cut! First, find 'Printers and Scanners' in the Windows settings. After you have switched on the compressor and the vent, switch on the laser cutter and plug it into the laptop.
-
You'll see 4 copies of the Epilog cutter in Printers and Scanners. Whichever one is not marked as offline when you have plugged it in and given it a few seconds after powering up is the one you need to select when printing.
-
Make the switch in the Illustrator print window. Then, click Setup and then Preferences in the subsequent window. This will bring up an old looking driver window. Here's where it's important to follow the steps correctly.
-
-
-
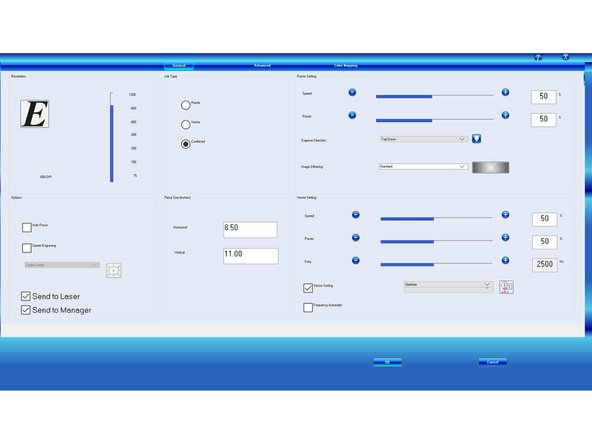
First thing's first, change the Horizontal and Vertical numbers to 24 and 16 respectively. This is the size of the build area of the Epilog.
-
Next, decide whether your print is a Vector, Raster or Combined. Ian will have gone over the differences in your initial laser cutting training. Consult the slides from that workshop if you are unsure. (If you think it might be both, combined is OK to choose!)
-
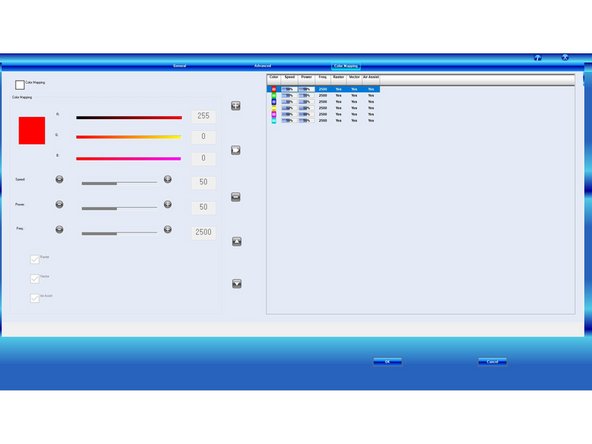
For cutting maps, we do not want through cuts. Therefore, we need to tell the cutter how to cut each part of the drawing we're feeding it. To do this, we use Color Mapping. Select that at the top of the screen, the third tab.
-
-
-
First, tick the box next to Color Mapping in the top left corner. This switches color mapping on.
-
Now, decide how thick you want the engraving to be. There is a guide available in the Lasercutting Google Drive folder. For the red color, change the speed and power settings accordingly. Frequency generally stays at 2500.
-
It's a good idea to double check that the red you've picked within Illustrator itself matches the RGB value shown here. If it doesn't, the printer will not follow these instructions.
-
Important! Once you've changed the values, you MUST click the button that looks like a fast forward button. This puts these instructions into the printer properly.
-
Adjust for the blue color, repeating these same instructions. The blue color will be a slower speed, since that's where you want the printer to cut through the wood.
-