Introduction
Here, we will attack the deviously difficult task of uploading files to GitHub without the treachery of a command line.
Tools
Parts
No parts specified.
-
-
Assuming that your account has not yet been created, you must create an account to upload files to GitHub
-
This is a straight-forward process of entering your name, email and password.
-
-
-
Request Access from Tim: thebert@brandeis.edu
-
Include your name with your username so Tim can add you to the team
-
-
-
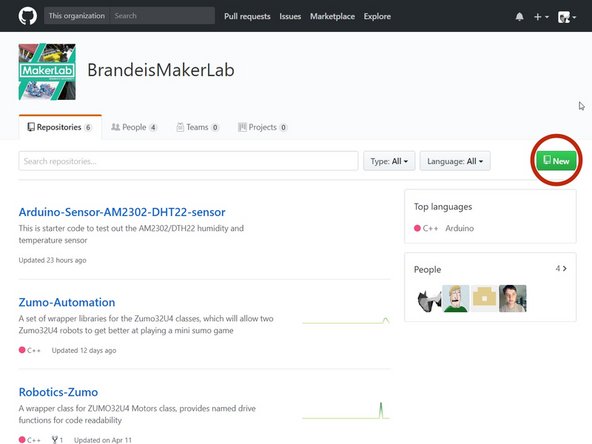
For this example, we will be adding a new repository to the Brandeis MakerLab GitHub
-
We need to start by clicking the green NEW Button (circled in red)
-
-
-
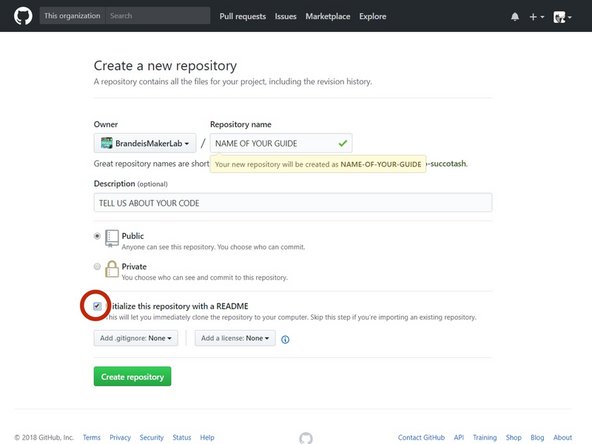
Fill out the form as you would with any other
-
Provide a information revealing name of your project, as well as a description of what the code is for
-
Create a README file that describes what the project is about (This is NECESSARY if you want to add any sort of code or other files into GitHub)
-
Click the GREEN create repository button to proceed
-
-
-
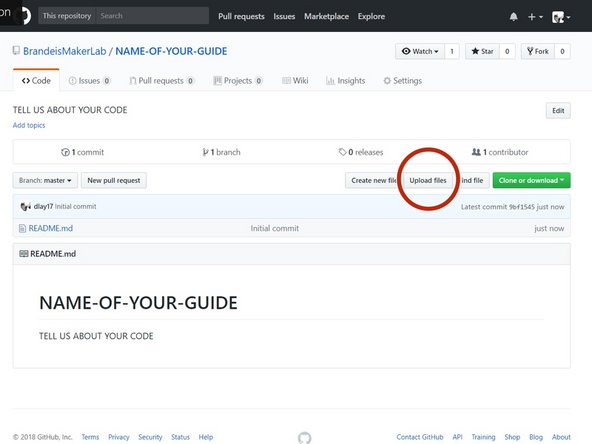
Congratulations! You have successfully created a project within the Brandeis GitHub page. Now, we need to proceed with adding files to that project
-
We need to start by clicking the upload file button circled in red
-
NOTE: if the page DOES NOT look like this when you created you repository, you must create a README file
-
-
-
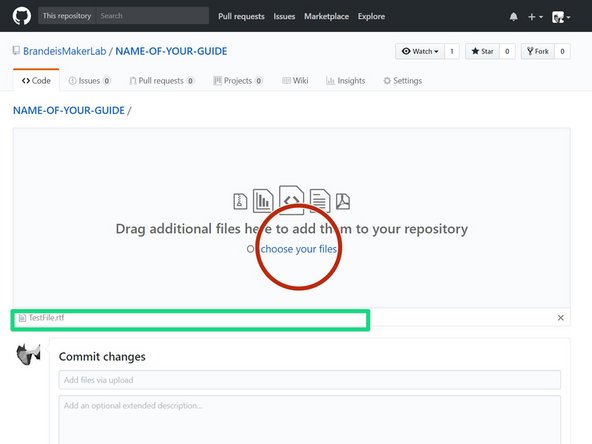
We are almost there, drag and drop the intended file onto the web browser OR click the choose you folder(circled in RED)
-
After the file has been uploaded, you should see it appear below the box (in GREEN)
-
After you are finished, click on the COMMIT CHANGES button at the bottom of the web page
-
Note: You can upload multiple files at once to the GitHub project, but these files must be UNDER 25 mb. If they are not, you must use a command line.
-
-
-
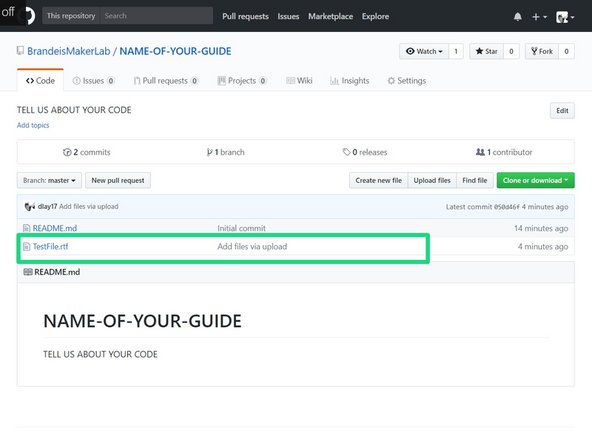
Your file should appear below the READ ME file.
-
CONGRATULATIONS! You have successfully added a project with files to the Brandeis GitHub!
-
Cancel: I did not complete this guide.
One other person completed this guide.


