
Difficulty
Easy
Steps
10
Time Required
48:00:00

User-Contributed Guide
This guide is not managed by the site's staff.
Quiz
0
Introduction
Here is an open source upper limb prosthetic device designed for anyone with a right arm upper limb difference adapted for riding a bike. The user must have some form of forearm for the attachment although wrist motion is not necessary.
Featured Document
-
-
Download the following four stl. files on https://www.thingiverse.com/thing:228705...
-
base_final
-
ninja_final
-
joint_final
-
lock_final
-
Download the .stl file for the gauntlet, labeled "Bike Handle Adapter" on the e-NABLE hub: https://hub.e-nable.org/content/perma?id...
-
-
-
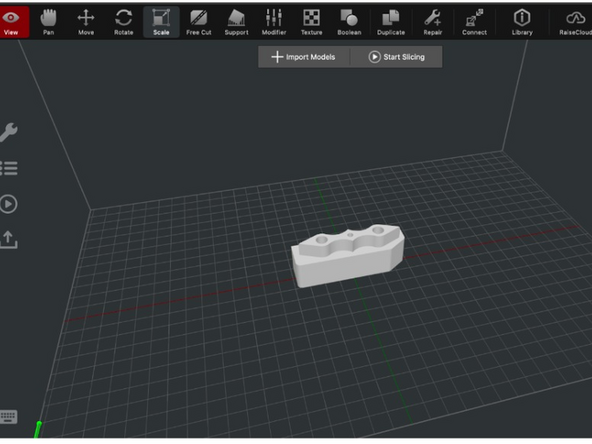
Open IdeaMaker
-
Import stl. files for the base, joint, and lock. If asked to scale to millimeters press "Yes"
-
Space out so they are not touching, make sure they are on the print bed. If they are off the print bed, the object will appear red. If they are on the print bed, they should appear white.
-
Add "auto-generated" supports
-
Set the infill to 50%
-
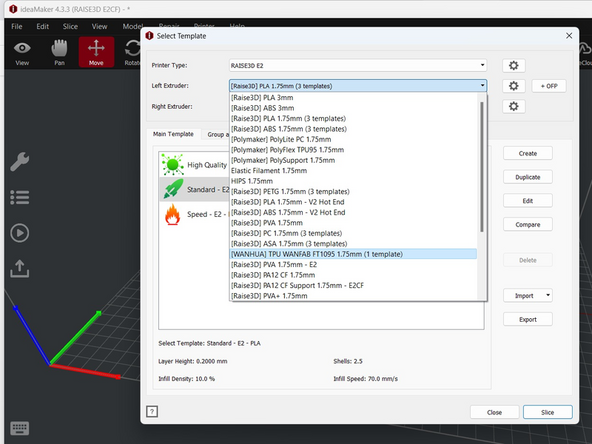
Click "Start Slicing". Change the printer type to Raise3D E2CF. Then change the filament type to PA12 CF 1.75mm, for Nylon.
-
Ensure the extruder with the nylon matches the extruder printing the piece on the slice.
-
Export G-code and download to a USB, then print on a Raise 3D E2CF.
-
-
-
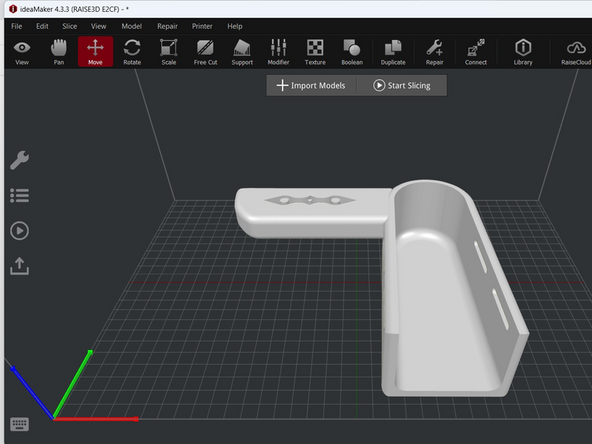
Open IdeaMaker
-
Import stl. files for the adapter, labeled "ninja"
-
If asked to scale to millimeters press "Yes"
-
The piece should be laying flat
-
Change infill density to 50%
-
Go into printer settings "advanced", change the nozzle to 240 degrees, bed temp to 50 degrees, and print speed to 15mm/sec
-
Press "Start Slicing". Change the filament to TPU. Make sure the extruder with the TPU filament matches the extruder printing the adapter.
-
Export G-code and download to a USB, then print on a Raise 3D.
-
-
-
Open IdeaMaker
-
Import stl. files labeled "Bike Handle Adapter"
-
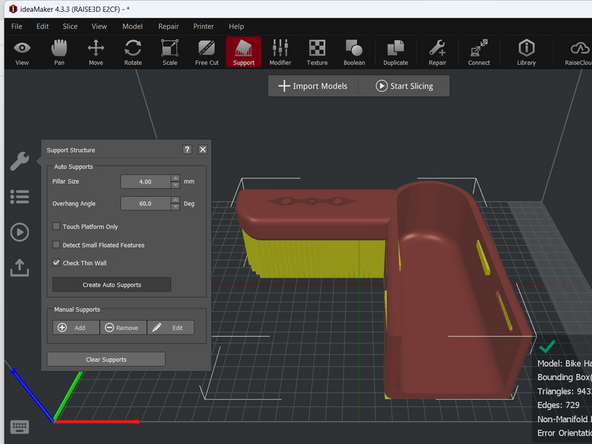
Add "auto-generated" supports
-
Set infill to 50%
-
Press "Start Slicing"
-
Select "PLA 1.75mm"
-
Make sure the extruder with the PLA filament matches the extruder printing the gauntlet.
-
Export G-Code and download to a USB, then print on a Raise 3D E2CF.
-
-
-
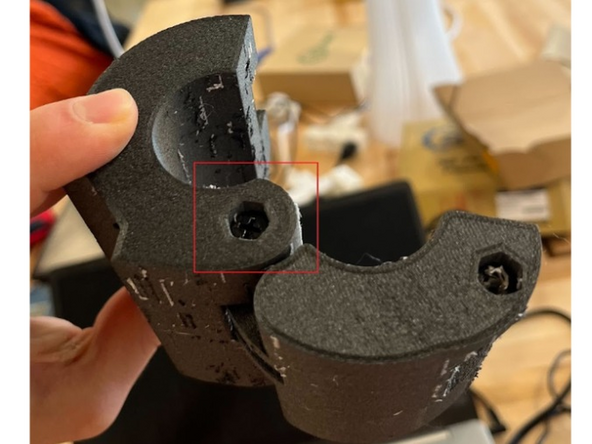
Take the base piece and joint piece and screw in an M5 x 40 screw at the location shown in the image
-
Then, take this now connected base/joint piece and screw in the lock piece into the joint piece using an M5 x 40 screw at the location shown in the image.
-
-
-
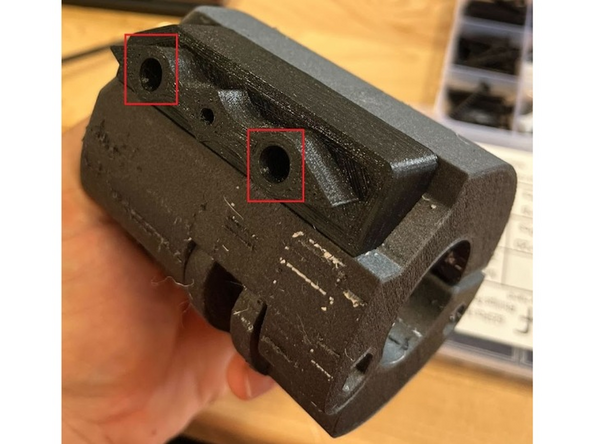
With your assembled and locked grip, take the TPU adapter piece and align it as seen in the picture. Take the 2 M4 x 30 screws and screw them into the holes shown in the picture.
-
Make sure that the adapter piece is snugly fit in the grip.
-
-
-
Align the adapter piece (which is now attached to the grip) into the adapter piece hole in the gauntlet. Make sure they tightly fit together.
-
-
-
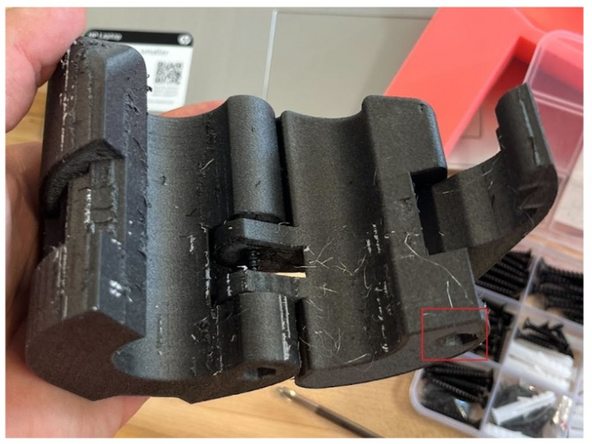
Then, thread the two velcro straps through the holes, and secure the velcro on itself
-
-
-
After placing the adapter on your arm using the Velcro straps, place the bike handle within the grip
-
Adjust the angle to the comfort of your arm as well as how you want the grip attached to the handle
-
Close the lock as shown in the video
-
-
-
Get on your bike and ride into the wind!
-
If the piece feels too large, try adding a towel between your wrist and the gauntlet to make it more snug.
-


We hope this guide was helpful and that with this product, you can enjoy the physical activity and impacts of riding a bike!
We hope this guide was helpful and that with this product, you can enjoy the physical activity and impacts of riding a bike!