
Difficulty
Easy
Steps
9
Time Required
03:00:00 - 05:00:00

User-Contributed Guide
This guide is not managed by the site's staff.
Quiz
0
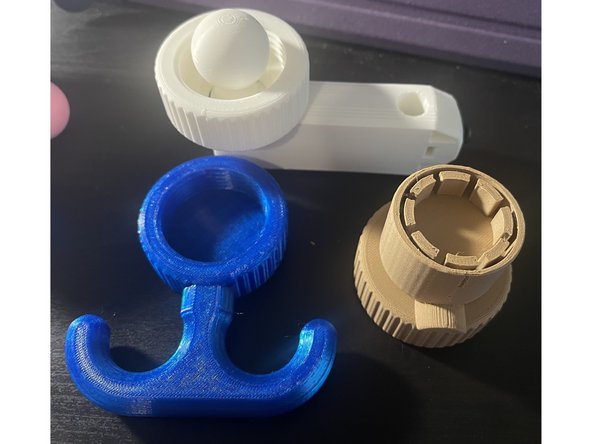
Introduction
This is a device that clips onto the palm of the hand. To use this design, the user must have a palm large enough to mount the device and a functioning hand to attach and detach the toolkit.The E-nabled Hand Clip design consists of one main body clip and three 1st Ver. Toolkits.
-
-
Measure the thickness of your hand at your purlicue in milimeter.
-
Divide this number by 24, this is the printing scale for all the parts you would like to set.
-
For example, my purlicue is 28 mm in thickness, so in the following steps, I will print all the parts in (28/24) = 117% scale.
-
-
-
In this step, we will modify the overall print settings for the CAM software. In this guideline, all the instructions are for PrusaSlicer.
-
Select 0.20mm SPEED for Print settings; select Prusament PETG for Filament; select 50% for Infill; uncheck Brim.
-
Change the support type to Organic. This is in the 0.20mm SPEED preset -> Support material -> Options for support material and raft -> Style.
-
If your calculated scale is not 100% n Step 1, click on the model in the bar on the right. Insert your calculated scale in Scale factors.
-
If not specified, this print setting will be used by default in subsequent sections of this guideline.
-
-
-
Download the model file for the E-nabled Hand Clip.
-
Import the file to PrusaSlicer.
-
One side of the model should lie on the build plate. If not, change the print orientation as shown in image 1.
-
Select Support on build plate only for Supports; set Scale factors appropriately.
-
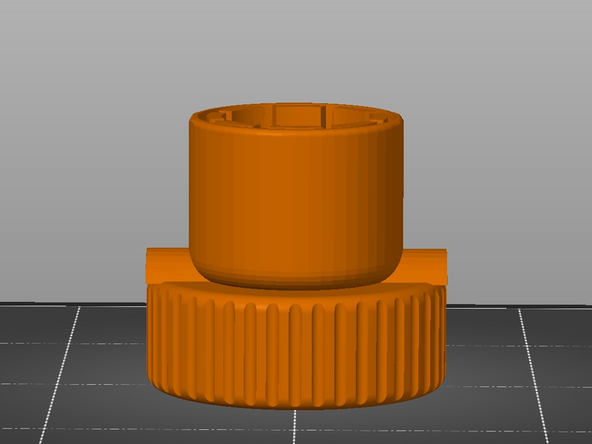
Click Slice now. If set up correctly, you should see the similar result shown in image 3.
-
-
-
This is an optional step. If you are using a customized toolkit, jump to Step 7.
-
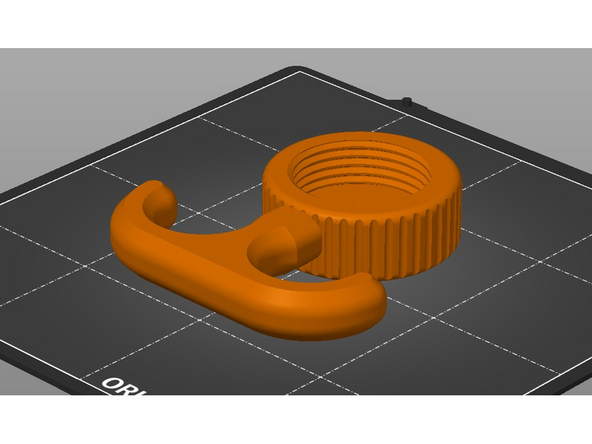
Download the model files for 1st Bottle Opener.
-
Import the file to PrusaSlicer.
-
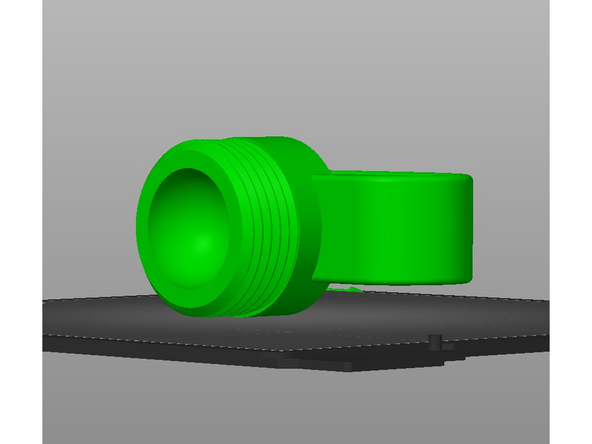
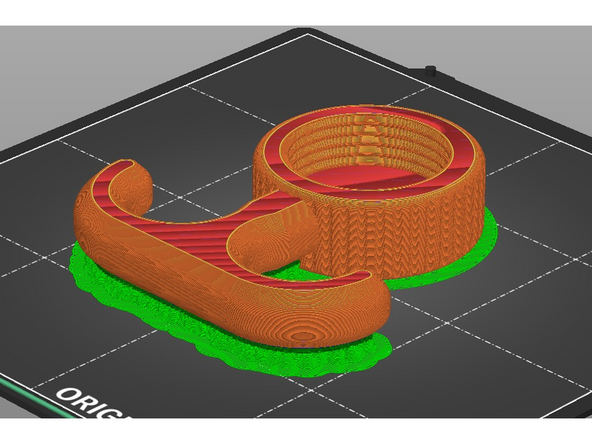
The nut side should lie on the build plate. If not, change the print orientation as shown in image 1.
-
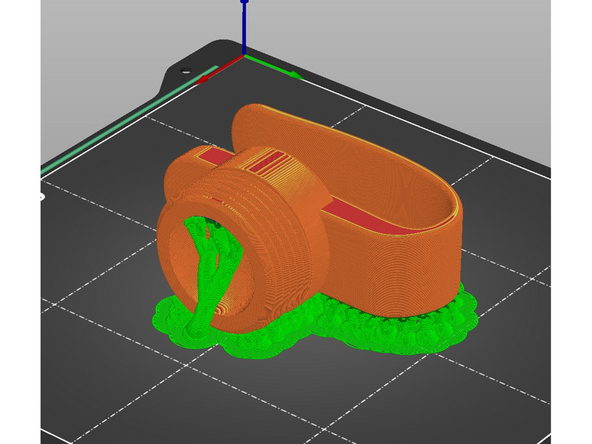
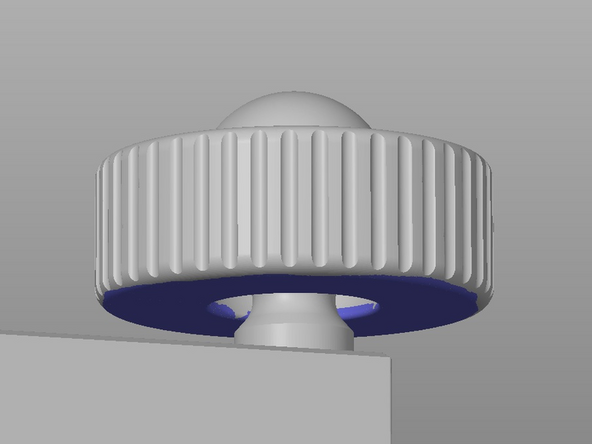
In the bar on the left, use Paint-on supports function to paint support areas inside the nut part, as shown in image 2. Then, select For support enforces only for Supports.
-
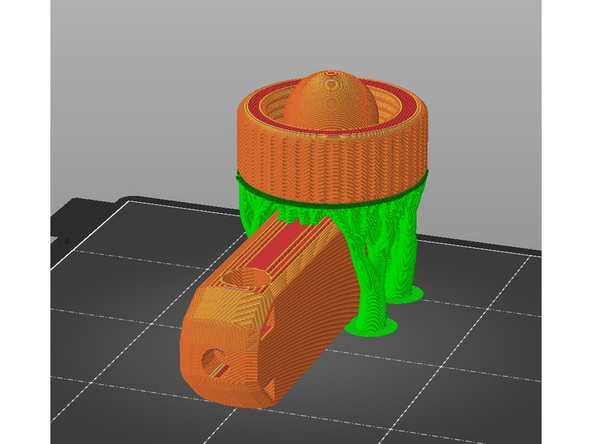
Click Slice now. If set up correctly, you should see the similar support result shown in image 3.
-
-
-
This is an optional step. If you are using a customized toolkit, jump to Step 7.
-
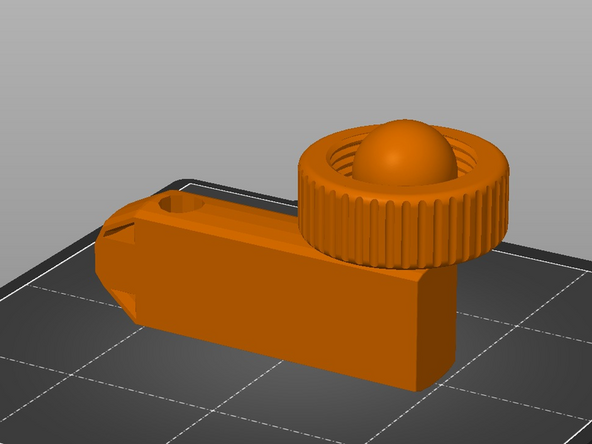
Download the model files for 1st Pen Holder.
-
Import the file to PrusaSlicer.
-
The model should be oriented same as shown in image 1. If not, change the print orientation.
-
Use Paint-on supports function to paint support areas inside the nut part, as shown in image 2. Then, select For support enforces only for Supports; select Prusament PLA for Filament.
-
Click Slice now. If set up correctly, you should see the similar support result shown in image 3.
-
-
-
This is an optional step. If you are using a customized toolkit, jump to Step 7.
-
Download the model files for 1st Bag Carrier.
-
Import the file to PrusaSlicer.
-
The model should be oriented same as shown in image 1. If not, change the print orientation.
-
Select Support on build plate only for Supports.
-
Click Slice now. If set up correctly, you should see the similar support result shown in image 2.
-
-
-
This step varies depending on the printer selected. If following this guideline, you should choose the Prusa MINI+ as your printer.
-
Check that the printer is well calibrated.
-
Check that the filament loaded in the printer is consistent with the setting in the gcode file.
-
Check that the printer has enough filament loaded to finish the print.
-
Check that the filament has no visible damage.
-
Insert the disk drive with the prepared gcode file to the printer and start the print.
-
-
-
When the prints are finished, you should grab a flush cutter to remove the supports.
-
Depending on the printing accuracy of your printer, the surface of the model may be rough. You should sand it with sandpaper. Caution: sanding with sandpaper generates micro-plastic dust, which can post health risks if inhaled or in contact with mucous membranes. Please do this under professional guidance.
-
-
-
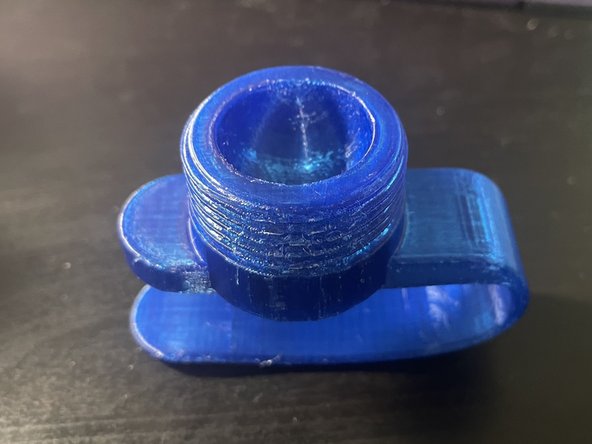
To see if your prints work, screw the nut of the toolkit part into the socket of the hand clip part.
-


Cancel: I did not complete this guide.
One other person completed this guide.