
Tools
-
-
Unplug the CR-10 and turn it off. Make sure it is cooled down before working on it!
-
Unscrew the X-Carriage from the CR-10. Leave all the electronics plugged in for now.
-
-
-
Mount your mounting plate to the CR-10 with 3mm screws (and washers if necessary).
-
Follow the official E3D Titan Aero build guide to build your Titan.
-
You may reuse the heater cartridge from the original HotEnd instead of the one in the Titan Aero package. This will save you soldering in the new one.
-
You may reuse the 40mm fan to cool the heatsink on the Titan Aero. This will save you soldering in the new one.
-
You will save the old active cooling centrifical fan. You can find a fan shroud that will mount it to your Titan Aero here.
-
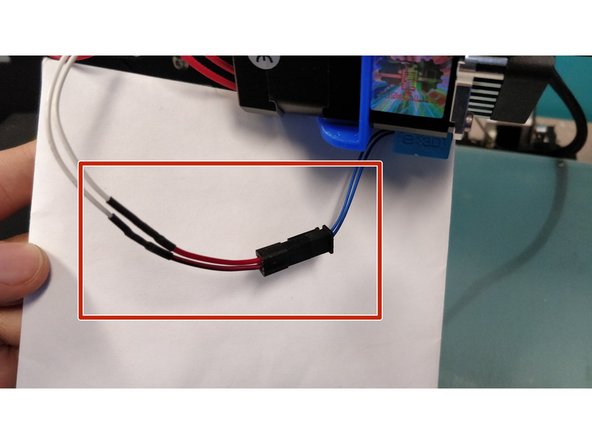
You will want to reinforce the wires coming off the extruder carriage so that they don't droop onto the build plate while printing.
-
Disassemble the old extruder motor and take it off, it's just extra weight. You don't need the bowden tubing either.
-
-
-
BE SURE THAT THE PRINTER IS UNPLUGGED FROM ALL POWER SOURCES BEFORE CONTINUING
-
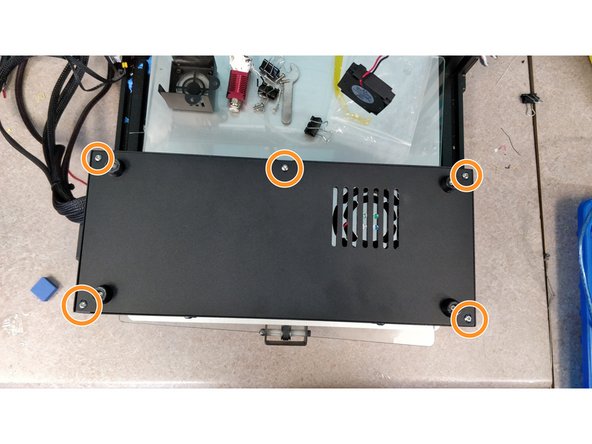
Unscrew the 5 M3 screws on the bottom of the electronics enclosure on the CR-10.
-
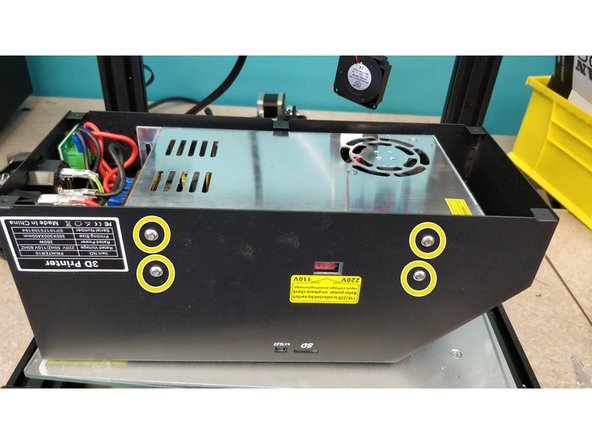
Unscrew the 4 M3 screws from the side of the enclosure to free the power supply. Carefully move the power supply out of the way.
-
Note that the power supply has wires coming from it. Be sure not to dislodge them
-
-
-
Download the latest version of the Arduino IDE (as of 4/20/2018, it was 1.8.5)
-
Download the U8glib Library for graphical LCD screens. (Download the zip file.) Save the zip somewhere on your computer.
-
Load the Zip file into Arduino by going to Sketch→Include Library→Add .ZIP Library. Select the zip file you downloaded.
-
Check the list of libraries to make sure U8glib shows up after you import it.
-
Import the Sanguino Electronics board to Arduino. Go to File→Preferences, and add the following URL to the "Additional Boards Manager URLs:" https://raw.githubusercontent.com/Lauszu...
-
Select Sanguino from the drop-down menu Tools→Board→Sanguino
-
-
-
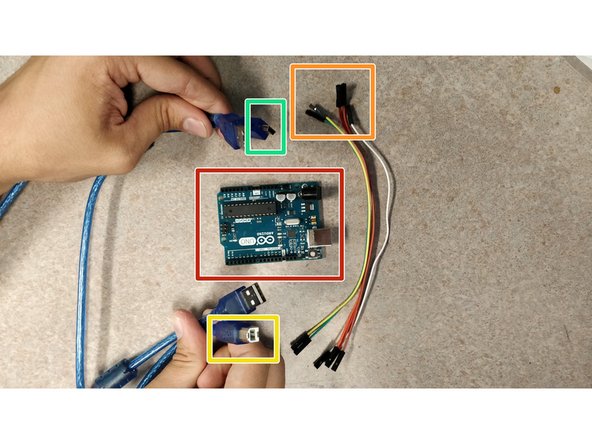
Collect the following:
-
Arduino Uno
-
Jumper Wires (5x Female-Female, 1x Female-Male)
-
USB B Cable
-
USB Mini Cable
-
-
-
Connect your Arduino Uno's ICSP pins to the main electronics board (Melzi board) of the printer like the picture.
-
If you hold the Melzi and the Uno as shown in the photo, you can line up the pins as you see them: Top right→ top left. Bottom right → Bottom right.
-
The one exception is the RESET pin, on the top left of the Melzi board. It goes to digital pin 10 on the Uno.
-
Here's a photo that shows the pin mapping. Note that it isn't with an Uno, but it's the same thing.
-
-
-
Plug the Arduino Uno into your computer.
-
Open Arduino IDE if you don't already have it open.
-
Select File → Examples → 11.Arduino ISP → Arduino ISP. This will open a new window with the example sketch. Work in here for the last few steps.
-
Select Tools → Programmer → Arduino as ISP
-
Select Tools → Board → Arduino/Genduino Uno
-
Select Tools → Port → Select the COM port that shows up. If none show up, plug the USB cable into another USB port on your computer and try again.
-
Hit the upload button.
-
Lights should flash on the Uno and Melzi
-
-
-
Set the following settings in Arduino IDE:
-
Tools → Board → Sanguino
-
Tools → Processor → ATmega1284 or ATmega1284P (16 MHz) (this should be the second from the bottom)
-
Tools → Port → Whichever COM port shows up
-
Tools → Programmer → Arduino as ISP
-
Select Tools → Burn Bootloader. The lights on the Uno should flash.
-
If you unplug and replug your USB cable, the printer's LCD screen should be blank, because we've changed the bootloader.
-
-
-
Unplug the USB cable.
-
We're done with the Arduino Uno, so unplug it from the Melzi and put it away.
-
Plug in a Micro USB cable to the Melzi board (in the side of the enclosure) and your computer. The screen should turn on.
-
Close the Arduino ISP example in Arduino IDE
-
-
-
Download a zip of our marlin configuration from GitHub
-
Unzip the folder somewhere you can find it. Navigate to: CR-10-E3D-Aero-Marlin-master → Marlin → Marlin.ino. This should open the whole Marlin project in Arduino IDE
-
-
-
Check the following settings before uploading your firmware:
-
Tools → Board → Sanguino
-
Tools → Processor → ATmega1284 or ATmega1284P (16 MHz) (this should be the second from the bottom)
-
Tools → Port → Whichever COM port shows up
-
Tools → Programmer → Arduino as ISP
-
You're now ready to upload Marlin! Click the upload button.
-
If all goes well, you should see the MakerLab logo on the boot screen of the printer. If it instead says "3D Printer," something went wrong with updating the bootloader. If it's still blank, then you didn't upload Marlin properly.
-
Make sure that all instances of Simplify3D are closed before flashing firmware to the CR-10. Simplify3D will deny Arduino access to the COM port and it won't be able to communicate with the printer
-
-
-
Put away your Arduino Uno.
-
Screw the power supply back in.
-
Screw the bottom plate back on.
-
Put the electronics carriage to the side of the printer so you're ready to print.
-
-
-
To plug in our new motor on the Titan Aero, you'll need to adapt the wiring from the old motor plug.
-
If you have a motor in your Titan Aero kit, use the cable that came with it. If not, you'll need to crimp or solder your own cable.
-
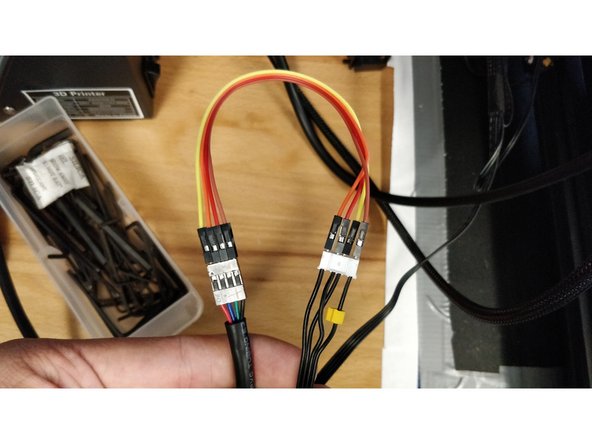
Use a set of four male-to-male jumper wires and connect the old motor connector to the board side of the Titan Aero cable. Follow the picture (Extender→Motor Wire), 1→4, 2→1, 3→3, 4→4
-
Note that on the motor-side, Pins 2 and 5 are not connected, they're not needed for a stepper motor.
-
Heat-shrink the connections so that they don't fall apart.
-
If you later find that your extruder motor is turning backwards, just flip the jumpers around, and it will reverse direction.
-
-
-
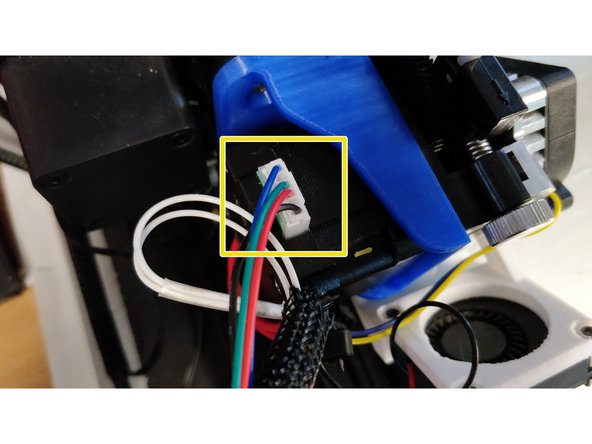
Connect the thermistor cartridge to the wires for the old thermistor. Ideally you should solder the Molex Microfit 3.0 connector to the printer-side of the cable so that you can replace the cartridge if you need to.
-
Tape the active cooling fan out of the way if it's not mounted currently.
-
Plug in the extruder motor.
-
Plug in the heater cartridge or use the old heater cartridge from the original HotEnd.
-
-
-
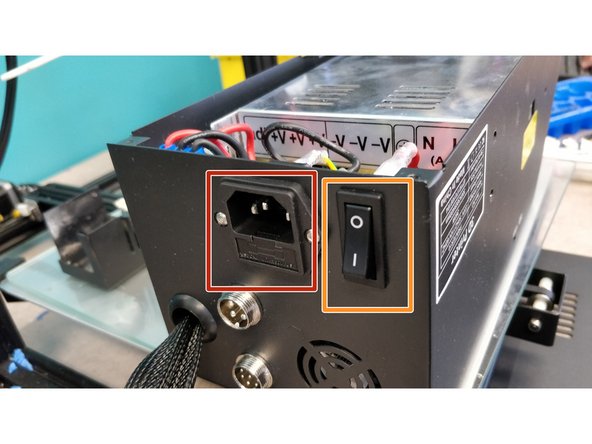
Plug the printer into a wall outlet and unplug it from USB.
-
Quickly toggle the power switch on and off to make sure no smoke comes out.
-
If all is goes well, turn on the CR-10. Make sure that the printer is reading the correct ambient temperature for the hotend and the bed.
-
Jog each axis to test them. Try homing them too.
-
Heat up the HotEnd and heated bed to make sure that they heat alright.
-
While the HotEnd is hot, try moving the extruder.
-
-
-
Be very careful, you're about to work with the HotEnd. Be careful not to burn yourself.
-
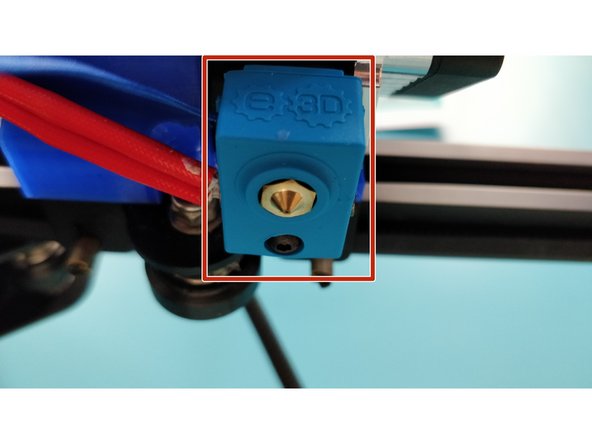
Take your HotEnd sock off.
-
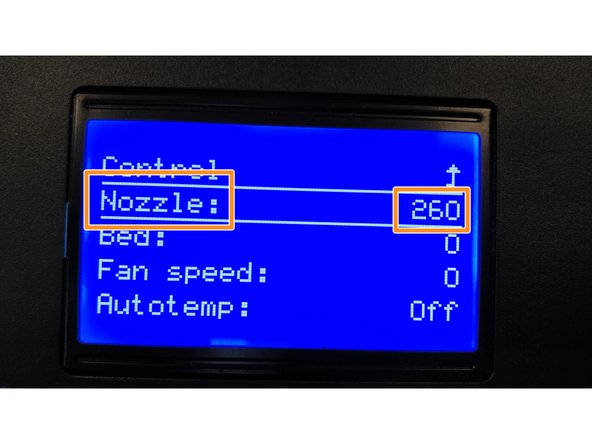
Once you're sure that the printer is in working order, heat your HotEnd up to around 280°C. On the LCD Screen this would be: Menu → Control → Temperature → Nozzle → Set to 280 (or as high as it goes if it's capped below that)
-
Tighten the nozzle with a wrench. It doesn't need to be incredibly tight, one finger on the wrench is all you need.
-
Load some filament in manually by pushing back the idler lever and inserting it until it comes out of the nozzle. Make sure no filament leaks from the top of the nozzle.
-
Cool down the printer.
-
-
-
Plug the printer into your computer with the Micro USB cable.
-
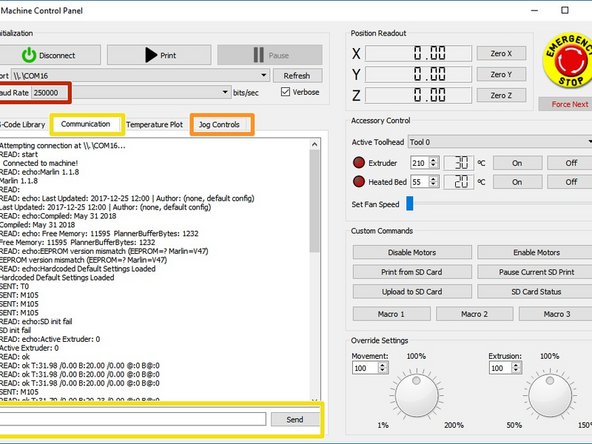
Open Simplify3D (or another printer control software). Connect to the CR-10. Make sure that you have the highest baud rate selected so that it can communicate with the printer.
-
Double check that you can jog the printer from your computer. Then move the nozzle away from bed.
-
Re-attach the HotEnd sock.
-
In the printer control tab (Ctrl + P in Simplify3D) go to the communication tab and enter the following line of Gcode to start the PID tuning: M303 C3 E0 S220 U
-
The printer should automatically heat up to around 220 and tune it's internal parameters so that it can maintain a constant temperature while printing.
-
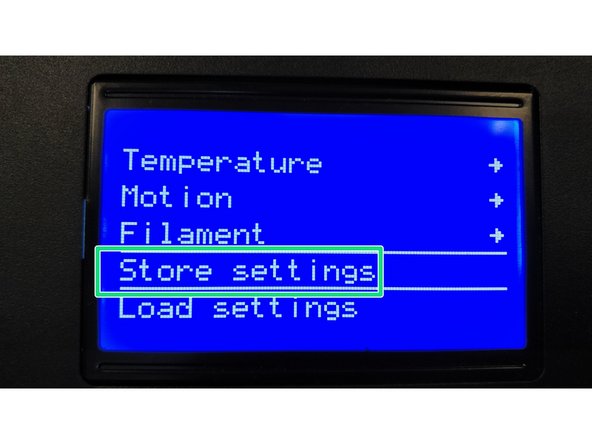
Once it's done (it starts cooling down all the way), store the new PID settings by going to Menu → Control → Store Settings. The printer will beep to let you know they're saved.
-
If you have mounted your active cooling fan you should turn it on while PID tuning to give an even more realistic printing environment to do the PID tune. If you forget you can always re-tune it by following these steps again.
-
-
-
Level your build plate
-
Clear wires off the build plate. Make sure that wires connected to the X-carriage and extruder can move freely.
-
Test Print!
-
If you somehow messed up the E-Steps per MM (You shouldn't have touched it), it will not change if you re-flash your firmware. This is because it is part of the EEPROM. To change that, use Gcode M92 (or the LCD Screen).
-
-
-
When slicing, use the CR-10 W/Titan Aero profile in Simplify3D.
-
If the profile doesn't show up in the dropdown list, you can find it here on GitHub.
-


